How to Re-Tip a Snooker Cue at Home: A Practical Step-by-Step Guide
· Mark O'Sullivan
Sooner or later every cue needs a new tip. Miscues start creeping in, the tip flattens into a mushroom, or a chunk simply shears off mid-frame. The good news is that re-tipping a snooker cue is one of the most satisfying jobs you can do at your own kitchen table — and once you've done it a couple of times, it becomes second nature. This guide walks through the whole process honestly, including the bits that catch beginners out.
A quick word of warning before we start: if your cue is a treasured, high-value handmade cue, there's no shame in taking it to a professional cue-man for a glued tip. But for practice cues, house cues, and everyday club cues, doing it yourself is cheap, quick and genuinely useful to learn.
Glue-On or Screw-On? Choose Your Approach First
There are two routes, and they suit different players.
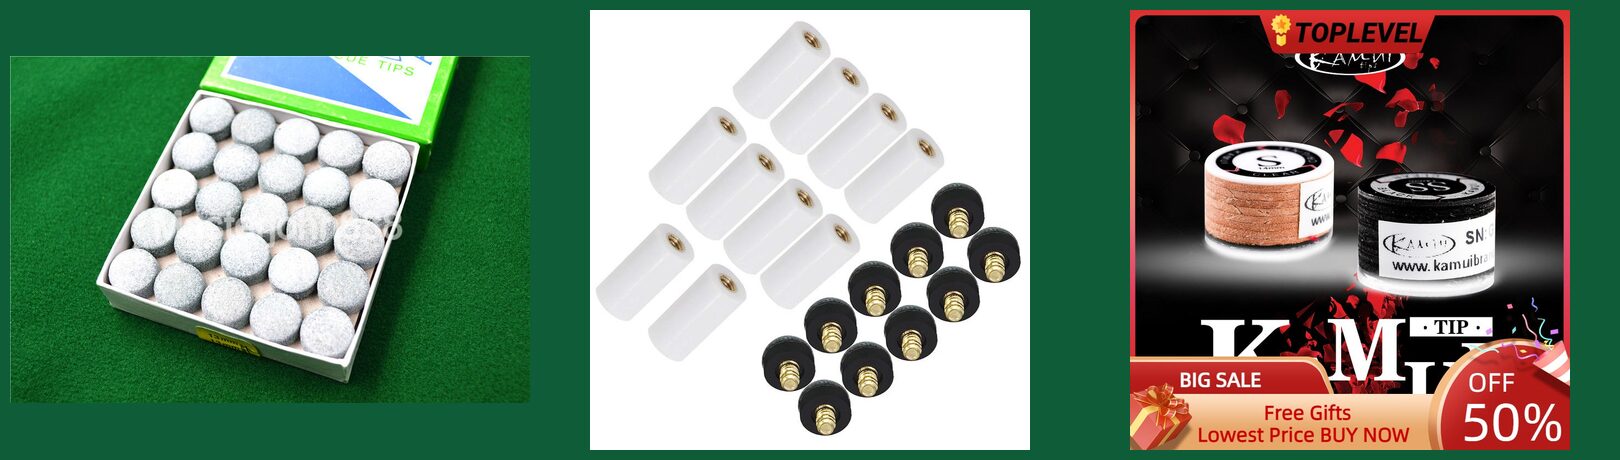
- Glue-on tips are the traditional choice and what nearly every serious cue uses. You sand the ferrule flat, glue the tip on, then trim and shape it. They play better and last longer, but they take a little patience. A budget pack like the T 50pcs Glue-on Pool Billiards Snooker Cue Tips 13mm Free Shipping Wholesales gives you plenty of tips to practise on without worrying about wastage.
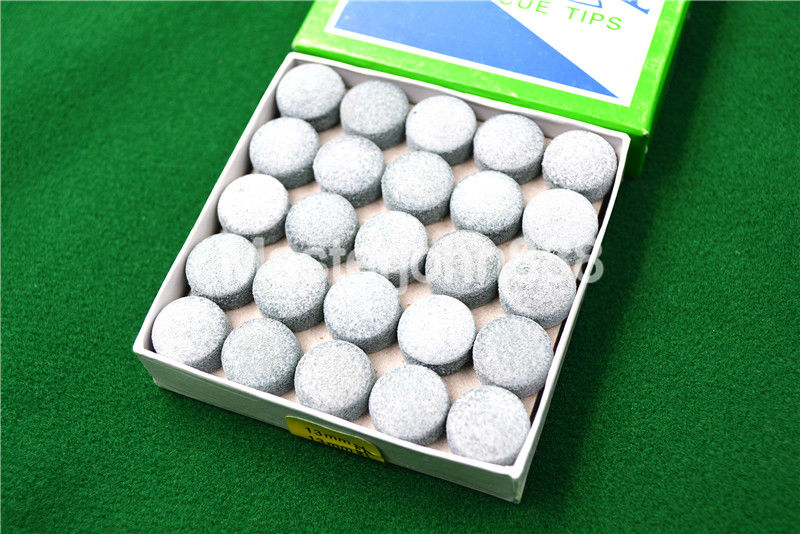
- Screw-on tips thread onto a metal insert and swap out in seconds. They're not for the purist, but for a house or bar cue they're brilliantly convenient. The 10PCs/set Screw On Cue Tips For Billiard Pool Cue Stick and Snooker Cue Replacement Parts Stick Repair Tool for Snooker 10mm Hot set is a fuss-free way to keep a spare cue in play.
If you want the best feel from a genuine branded tip, the Japanese Original KAMUI Clear Cue Tips Billiard Pool Cue KAMUI Tip 14mm SS/S/M/H Snooker Tip Brown 11mm M/MH Billiard Accessory is a well-regarded option in soft, medium and hard grades — just note snooker cues typically want a smaller diameter than pool, so check the tip size before buying.
What You'll Need
- A replacement tip (or a pack, so you can afford a mistake)
- Fine sandpaper (around 240–400 grit) and a flat surface
- A quality super glue or dedicated tip adhesive
- A sharp craft knife for trimming
- A tip burnisher and shaper such as the 1/2/3pcs Professional Billiard Pool Cue Burnisher Cleaner Polisher Home Cleaning Snooker Pole Training Pool Ball Accessories
- Fresh chalk once you're finished — a multipack like the 4pcs Cheap Billiards Snooker Cue Chalk Billiard No-slip Chalk Indoor Sport Accessories means you're never caught short
Step by Step: Fitting a Glue-On Tip
1. Remove the old tip
Slice the old tip off cleanly with your knife, or sand it down. Take care not to gouge the ferrule underneath.
2. Prepare the ferrule
Lay your sandpaper flat and sand the ferrule face in gentle circles until it's perfectly flat and lightly scuffed. A flat, keyed surface is the single biggest factor in a tip that stays put. Don't skip this.
3. Glue and clamp
Apply a thin, even layer of glue to both the ferrule and the base of the tip. Press them together squarely — alignment matters — and hold firm pressure for a minute or two. Let it cure fully before touching it.
4. Trim and shape
Carefully pare the overhang down to match the ferrule diameter, rotating as you go. Then dome the tip to roughly the curve of a small coin using your shaper. This is where the burnisher earns its keep.
5. Burnish and chalk
Burnish the sides to seal them, chalk the tip, and play a few gentle shots to bed it in. Expect the first session to feel slightly different until the tip settles.
Choosing the Right Tip: A Quick Comparison
Here's how a few catalogue options stack up so you can match the tip to how you play.

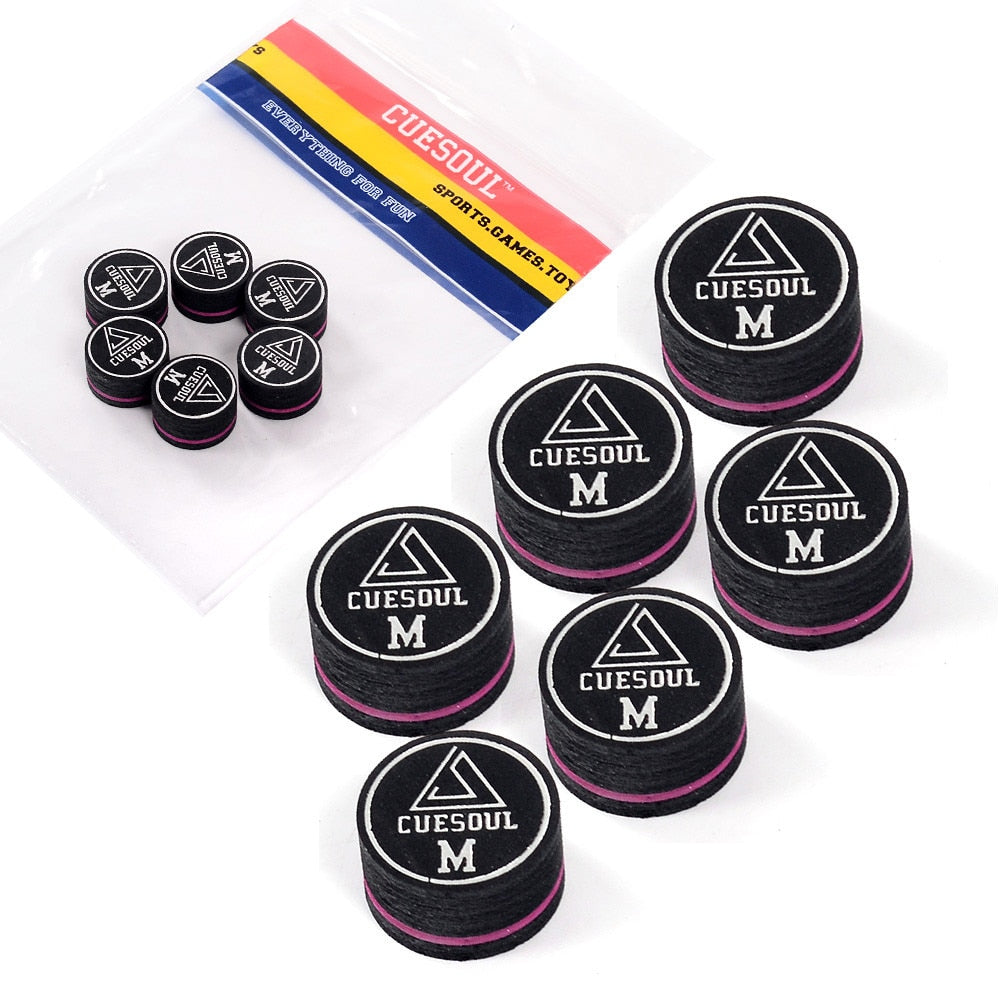
Honest expectations: the budget glue-on and screw-on packs are imported and quality can vary tip to tip within a pack, so buy a few and pick the best. Branded tips cost more but tend to be more consistent. The baked suede set in the CUESOUL 6pcs/set 14MM Baked Pig Suede Billiard Snooker Cue Tip & Pool Cue Tip sits in between — better than the cheapest packs, still keenly priced.
Keeping Your New Tip Playing Well
A fresh tip is only as good as the care it gets afterwards.
- Chalk properly. Brush the chalk on lightly rather than grinding it in. Good, no-slip chalk reduces miscues and stops you having to shape the tip so often.
- Keep the sides sealed. A quick pass with the burnisher every few weeks stops the tip mushrooming and flaking at the edges.
- Rough the surface, not the sides. A lightly scuffed dome holds chalk; a shiny, glazed tip is your enemy. Prick or scuff it occasionally.
- Don't over-shape. Every reshape removes material. Small, regular maintenance beats aggressive fixes.
Final Thoughts
Re-tipping is a skill worth having. It saves money, keeps a spare cue ready, and — with a glue-on tip done carefully — restores the crisp, dependable strike that makes potting a pleasure. Start on a cheap practice cue, take your time on the ferrule prep, and finish with a proper burnish and good chalk. Do that, and even a modest cue will feel transformed.